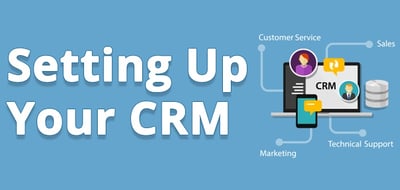
 If you are serious about your marketing, and we know you are since you are reading this blog, you need a customer relationship management (CRM) tool. If you are a HubSpot user, then you already know that their CRM is automatically integrated with their suite of marketing tools. If you are not familiar with it, check it out to learn more.

Once you have the HubSpot CRM, all you have to do is follow 6 simple steps to set it up and be off and running with an amazing system.
- Add Users to the Platform
Get all your team members rolling by adding them to the system: settings — team — invite and manage users. Here you can see everyone who currently exists in the system and add those who are missing. Click “add user” and send a welcome email with log-in info. If you are an admin, this is also where you will edit user permissions. Remember, since this is integrated with HubSpot Sales, all sales team members can log into the CRM as well.
- Create Custom Properties
In the CRM, “properties,” sometimes referred to as “fields,” stores details about your contacts and companies. In addition to the standard properties—phone number, city—you can create custom properties that are specific to your business needs.
Go to settings — select contacts, companies, or deals — edit — create new property — add label — select field type — click save.
- Customize Deal Stages
In addition to properties, you can also customize deal stages, which allows you to categorize and track the deals you are working on within the CRM. “Each deal stage has a probability associated with it that indicates the likelihood of closing deals marked with that deal stage.” (HubSpot). To customize, go to settings — deals and scroll down to the deal stage editor. Click “add stage” to add a new stage or click on an existing deal to edit its properties. To rearrange your stages, simply click on it and drag it to move.
- Import Contacts and Companies
Great news! Now you are ready to import any contact, company, or deal data that you have, which you need to do before you start working in the CRM. Note that HubSpot deduplicates contacts in the CRM using the Email address and deduplicates companies using the company domain name (website domain) property.
Before you import, decide how you want to associate contacts with companies. You can let HubSpot do this for you by turning on “automatic association of companies,” which automatically associates contacts’ email addresses with the company domain name.
Import manager (contacts, companies, or deals) — gear icon —import — upload a CSV document. Everything should appear as soon as the import is finished. You can then map CSV file columns to properties in the CRM.
- Customize Your Views
You can create custom views within contacts, companies, deals and task objects by clicking on the preferred option on the left sidebar. For example: Go to contact and click on the “add filter” + button, then choose the properties and criteria that you wish to use for segmentation, such as by geographic location. Use “AND/OR to combine search phrases. Once you have created the filter, you can save it as a new view — save this view and name it — or export the list.
- Configure and Celebrate
You made it to the final step, so get ready to do your happy dance. Now you can configure your default settings where you can set which properties appear in the “about” section and what appears when you create a new contact, company, or deal. Settings — contacts, companies, or deals — manage portal defaults. At this point, you can also set your default time zone and currency settings under “configuration.”
Congratulations, you have customized your HubSpot CRM! Now, you are ready to put this tool to use and watch your marketing effort take flight. We talk a lot about the many advantages of using HubSpot to help with inbound marketing, including web hosting and unparalleled integration capabilities. So, if you are wondering which HubSpot package is right for you, check out this post where we break down the pros and cons of the different packages.
